Building a Ploopy Classic Trackball

Lately, I’ve been on a quest to find the most ergonomic desktop setup. I spend a lot of time at my computer and I’ve started to get the usual aches and pains associated with a sedentary desk job. Most recently, it has been my mouse arm that has been bothering me, namely my forearm, elbow, and fingers. I’ve been rotating through different kinds of mice, including the Logitech MX Vertical, Logitech MX Ergo, Kensington SlimBlade Pro, and Steelseries Aerox 3, but they mostly just shuffle the pain around. Each one of these mice is a solid choice; I just can’t seem to find something that works for me long term. Enter the Ploopy Classic Trackball.
The Ploopy Classic Trackball was suggested to me by a coworker and I was somewhat intrigued right from the beginning. The products that Ploopy sells are completely open source. Their GitHub repo is public and includes the hardware designs and software. You can buy a fully assembled mouse or you can buy a kit to assemble. The shells for their products are all 3D printed and for some of their products, you can buy the electronics kit and 3D print the shells yourself. The software is built on QMK which provides for excellent configurability (for better or for worse; more on that later). One of the things that interested me the most is their trackballs use roller bearings instead of the static nubs you typically see in trackball mice these days. Roller bearings allow the ball to move freely, but don’t gum up or require the same level of maintenance as the nubs. I really like my SlimBlade, but I have to oil the ball daily for it to keep rolling without squeaking. The Ploopy Classic Trackball shouldn’t need that kind of maintenance and as a bonus, it has the same ergonomic shape as the old Microsoft Explorer Trackball. I decided I didn’t want to pay the premium for the fully assembled mouse, so I bought the kit and a soldering iron. Here’s my assembly experience and my thoughts after using the mouse for a couple weeks.
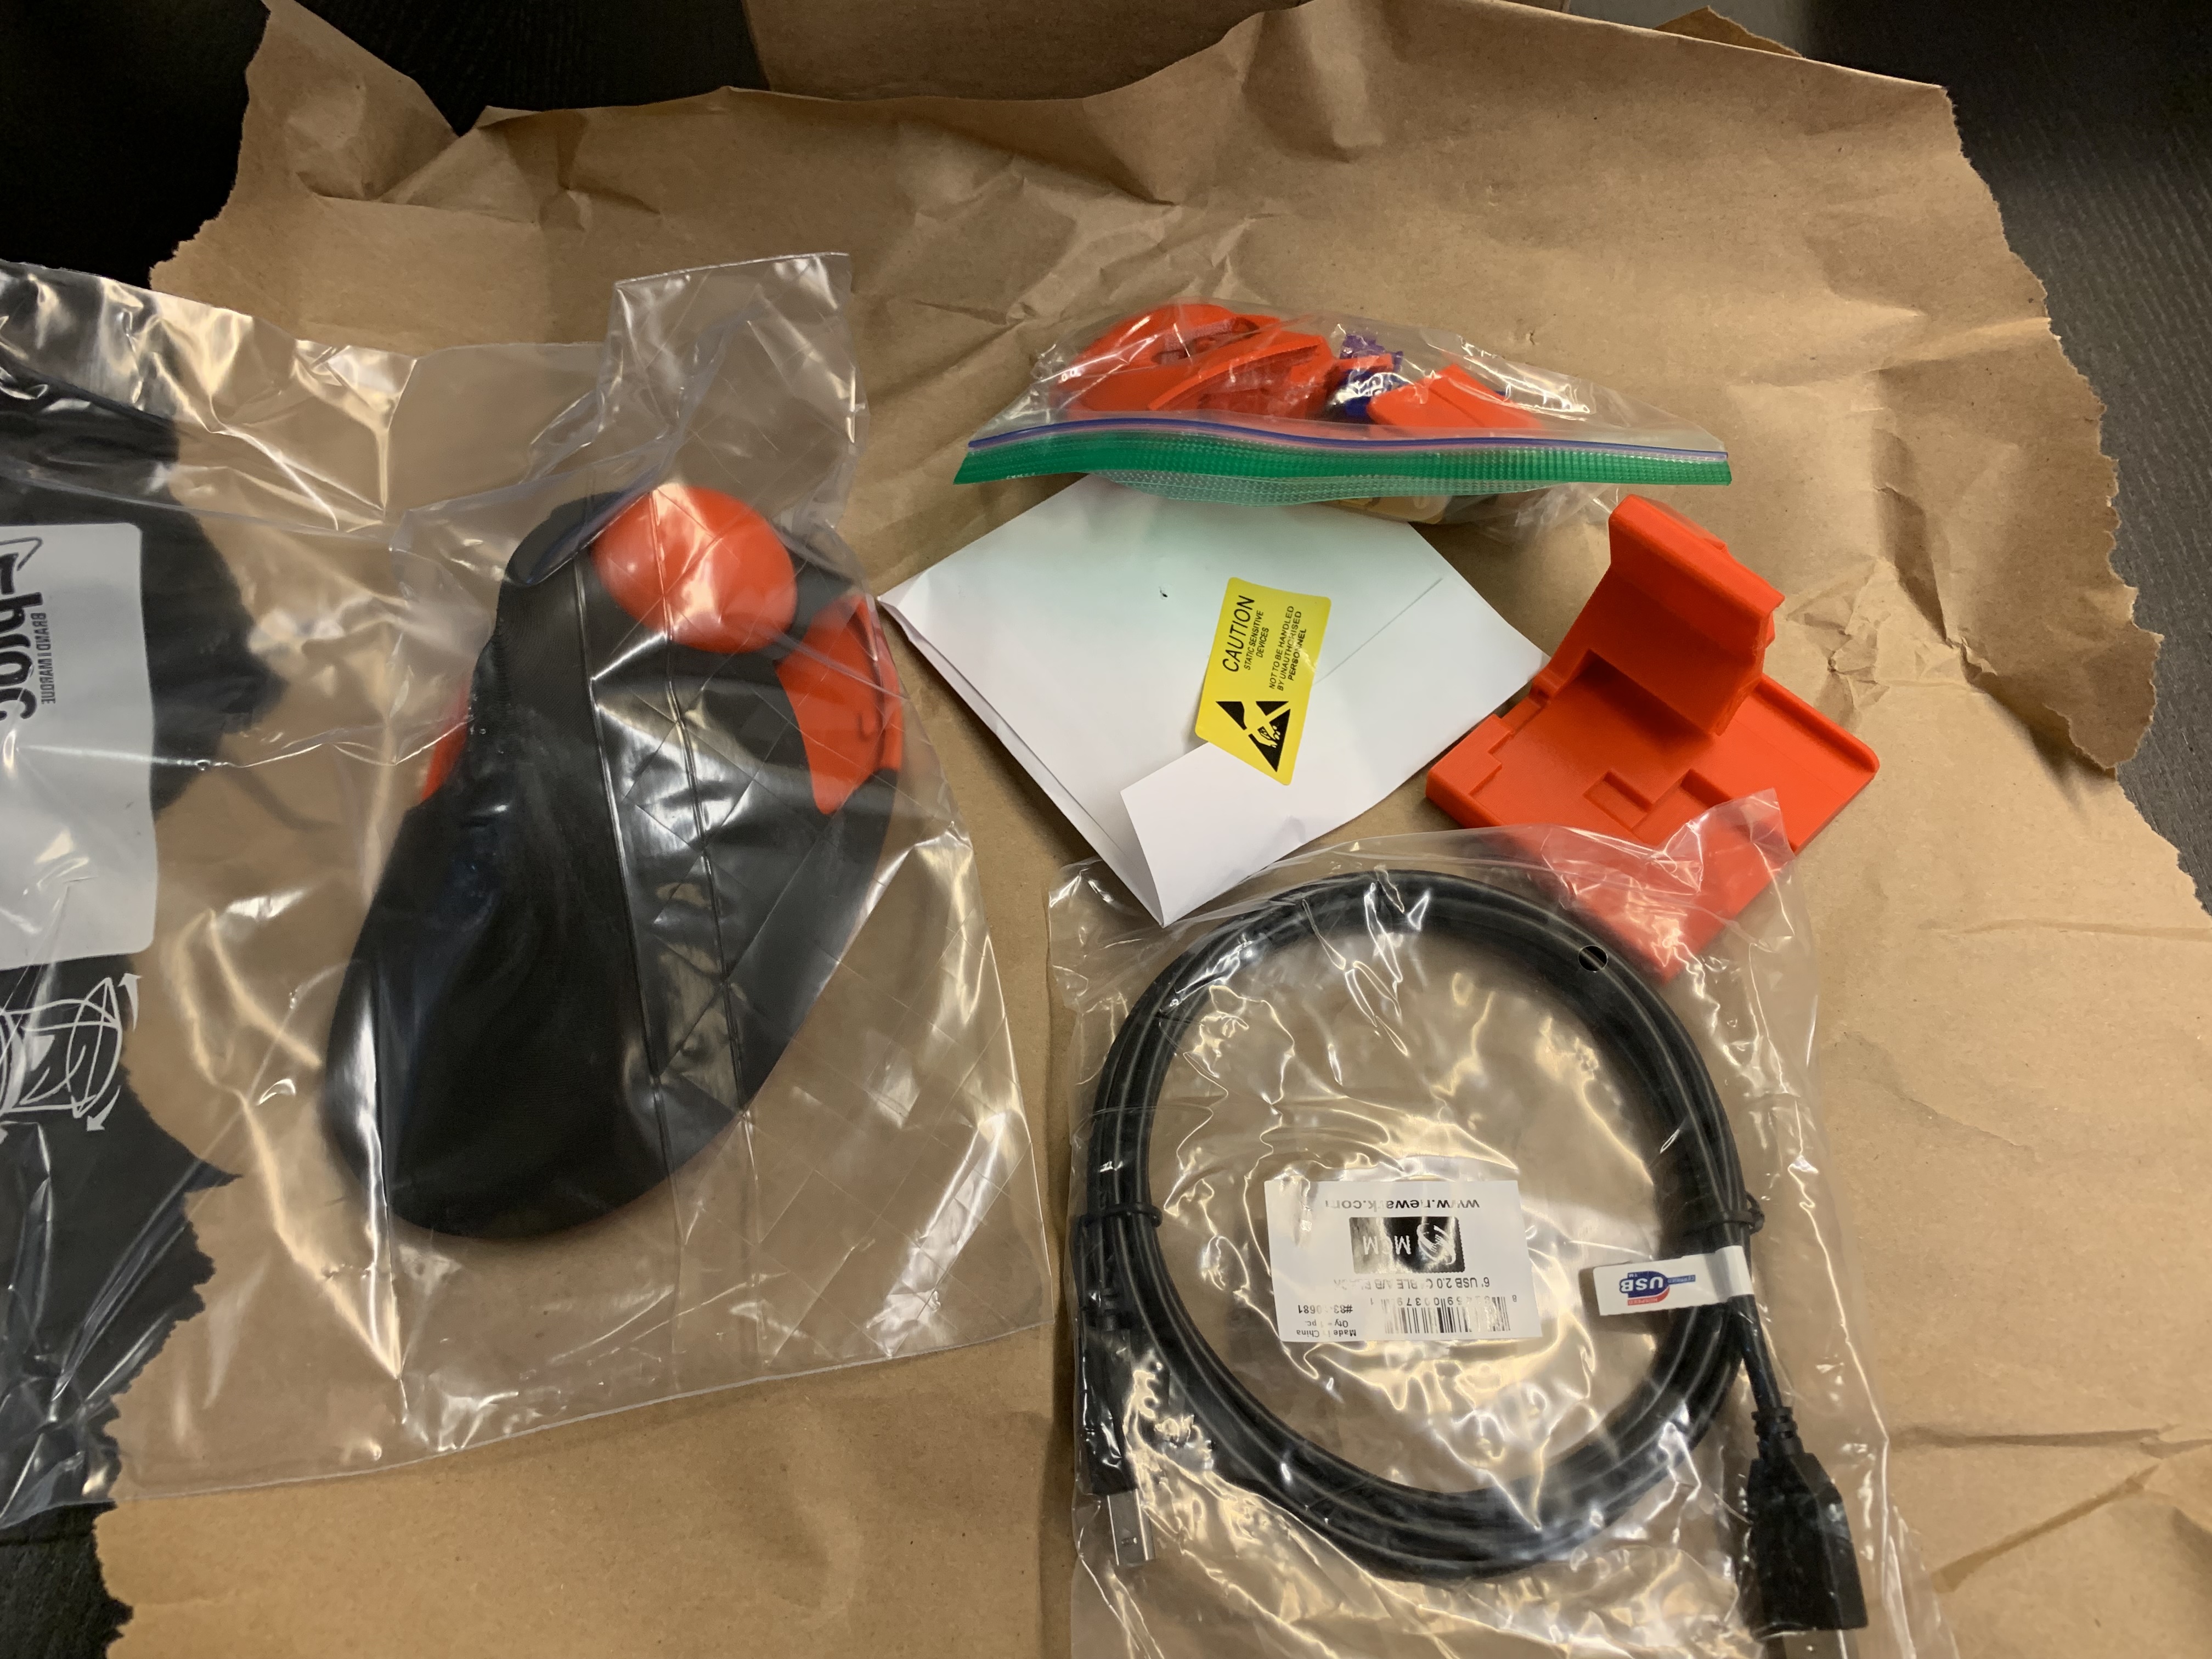
What you see in the picture above are all the parts provided in the kit. It includes a snooker ball for the trackball, 3D printed shell and parts, screws, two PCBs, a jig for soldering, and some other odds and ends. The instructions for assembly can be found in the Ploopy GitHub wiki here. There’s an assembly video that I found helpful, but mostly I just followed the guide.
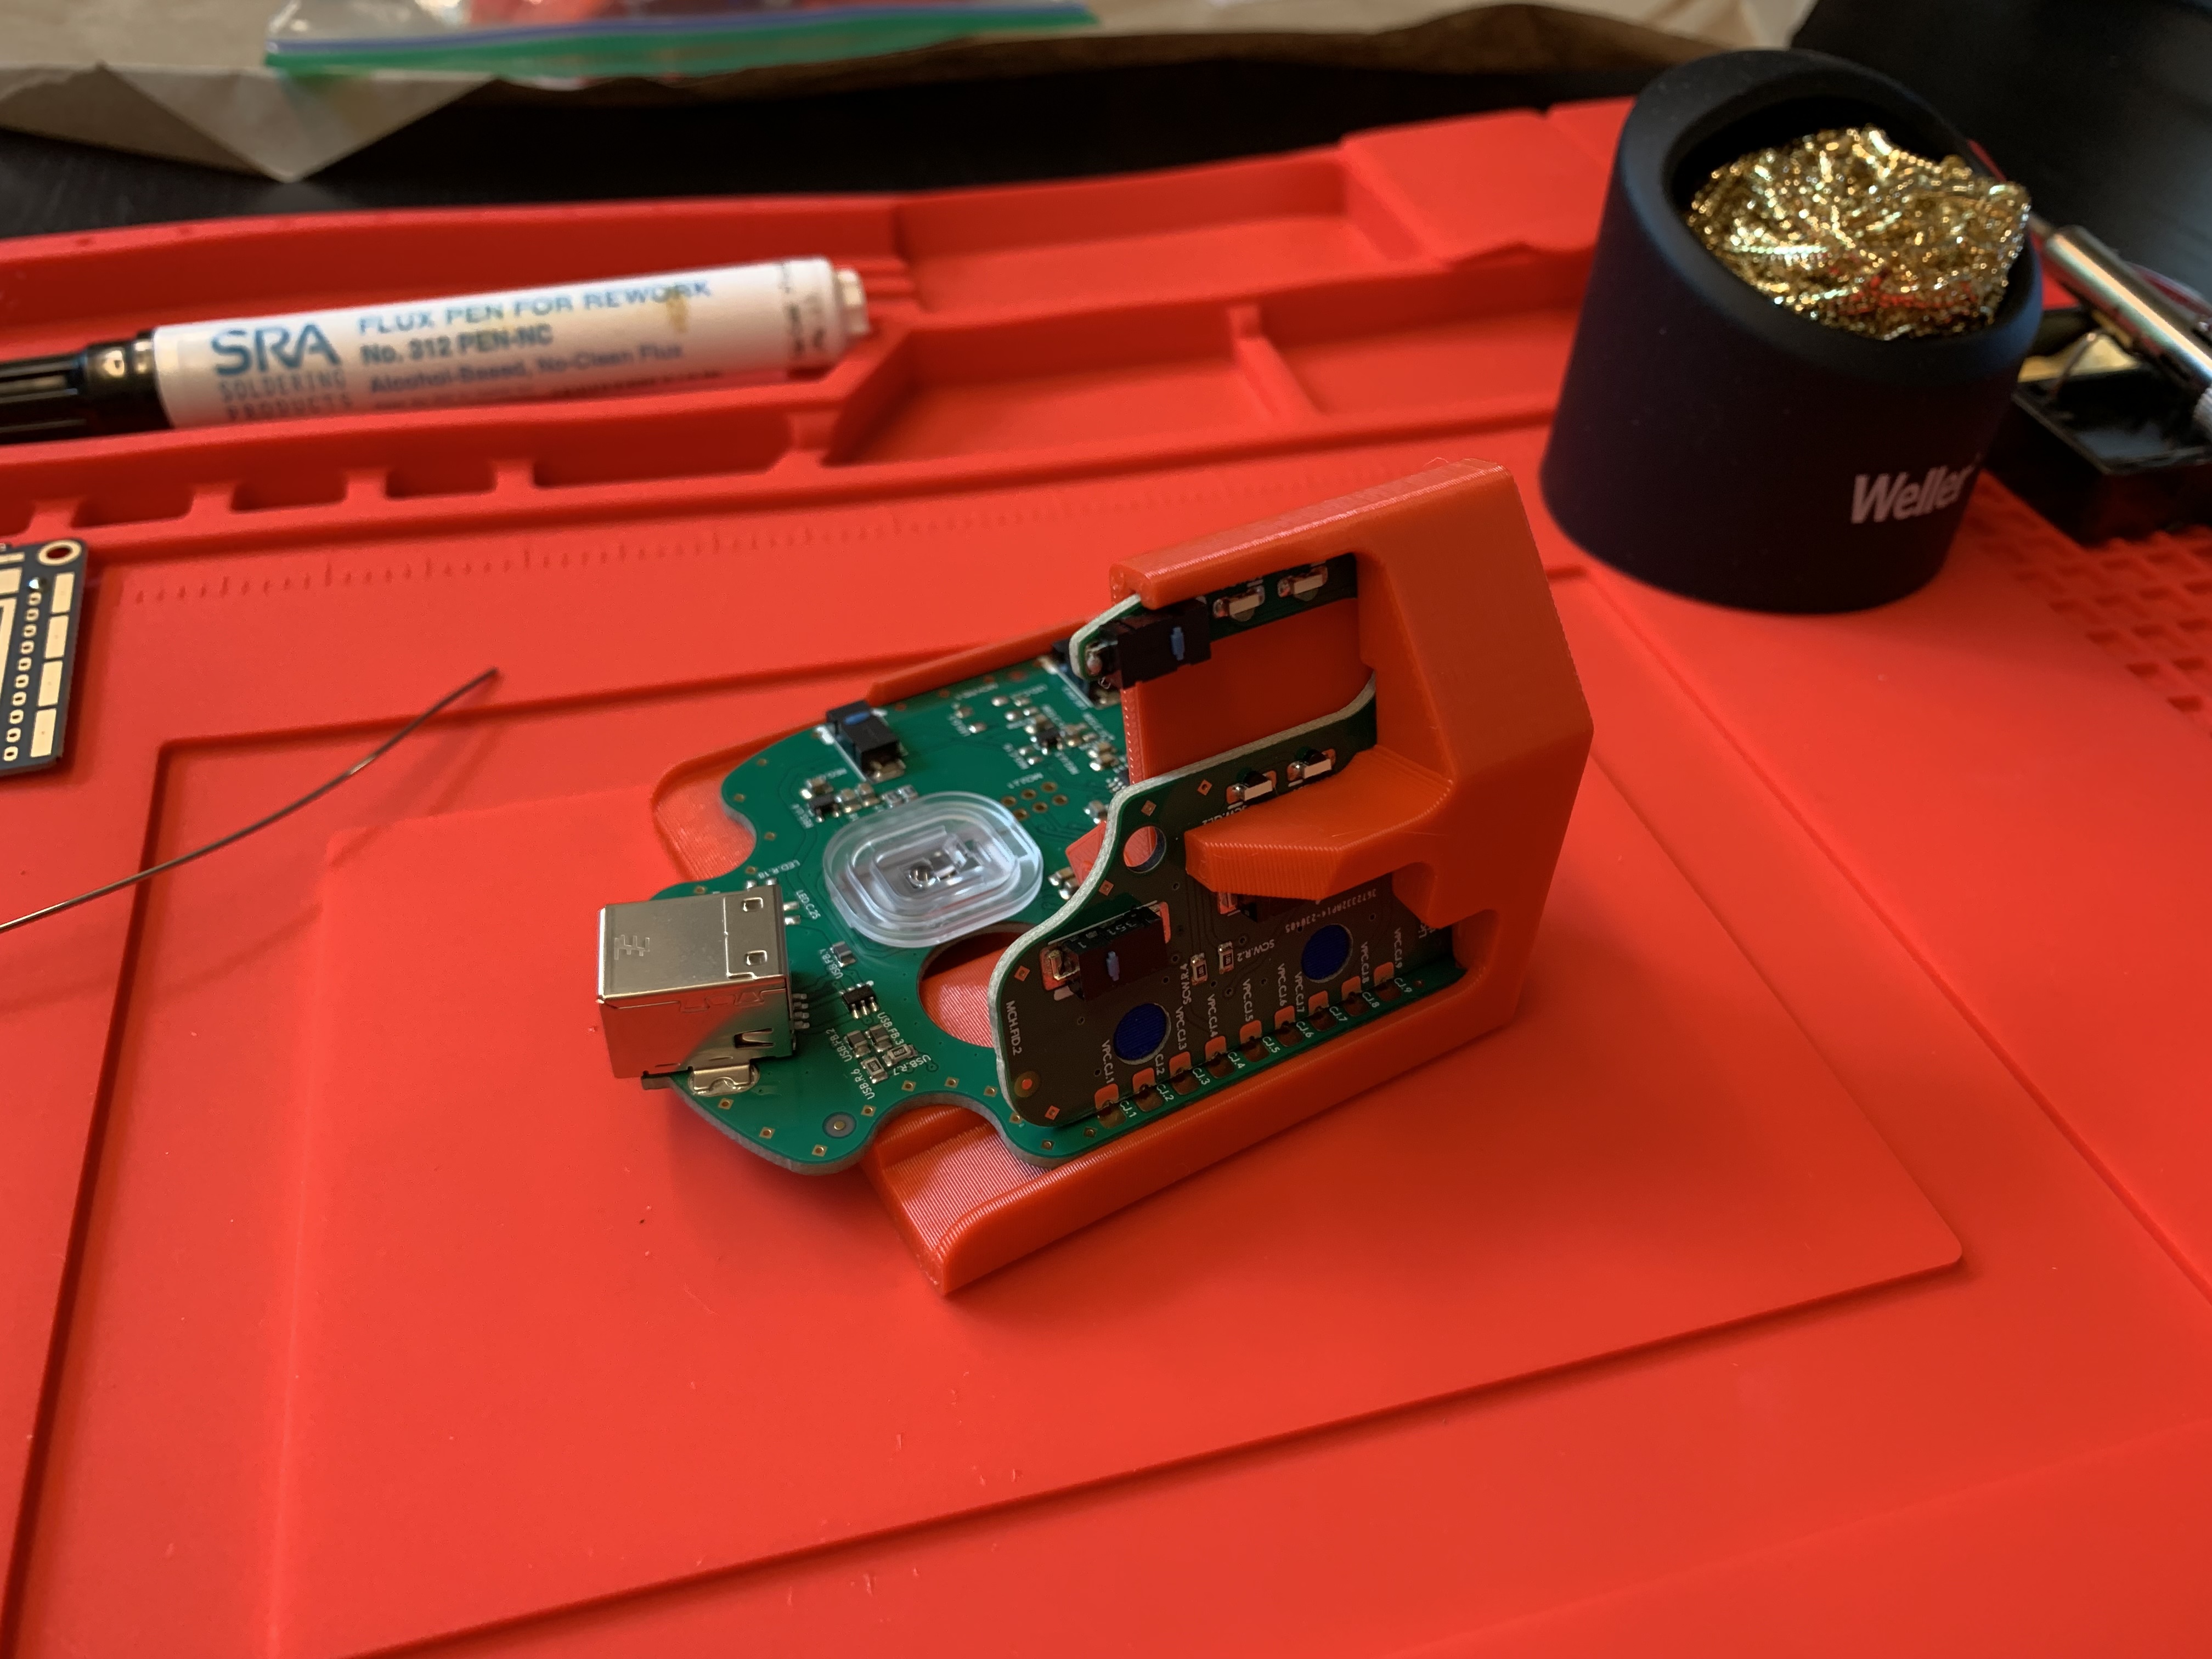
The most anxiety-inducing part of the assembly was the soldering. First, you need to solder the PMW-3360 chip to the base PCB. The pins are really tiny, but after watching a few soldering videos, I was able to complete this step without too much hassle. Then you insert the two PCBs into the soldering jig. This lines up the contacts that you need to solder next. Here’s what it looks like at this point in the process:
I actually had more trouble soldering these large contacts than the tiny pins. You need a lot of heat from the soldering iron to properly join the pads. After this, it’s mostly popping parts in place and screwing them down.
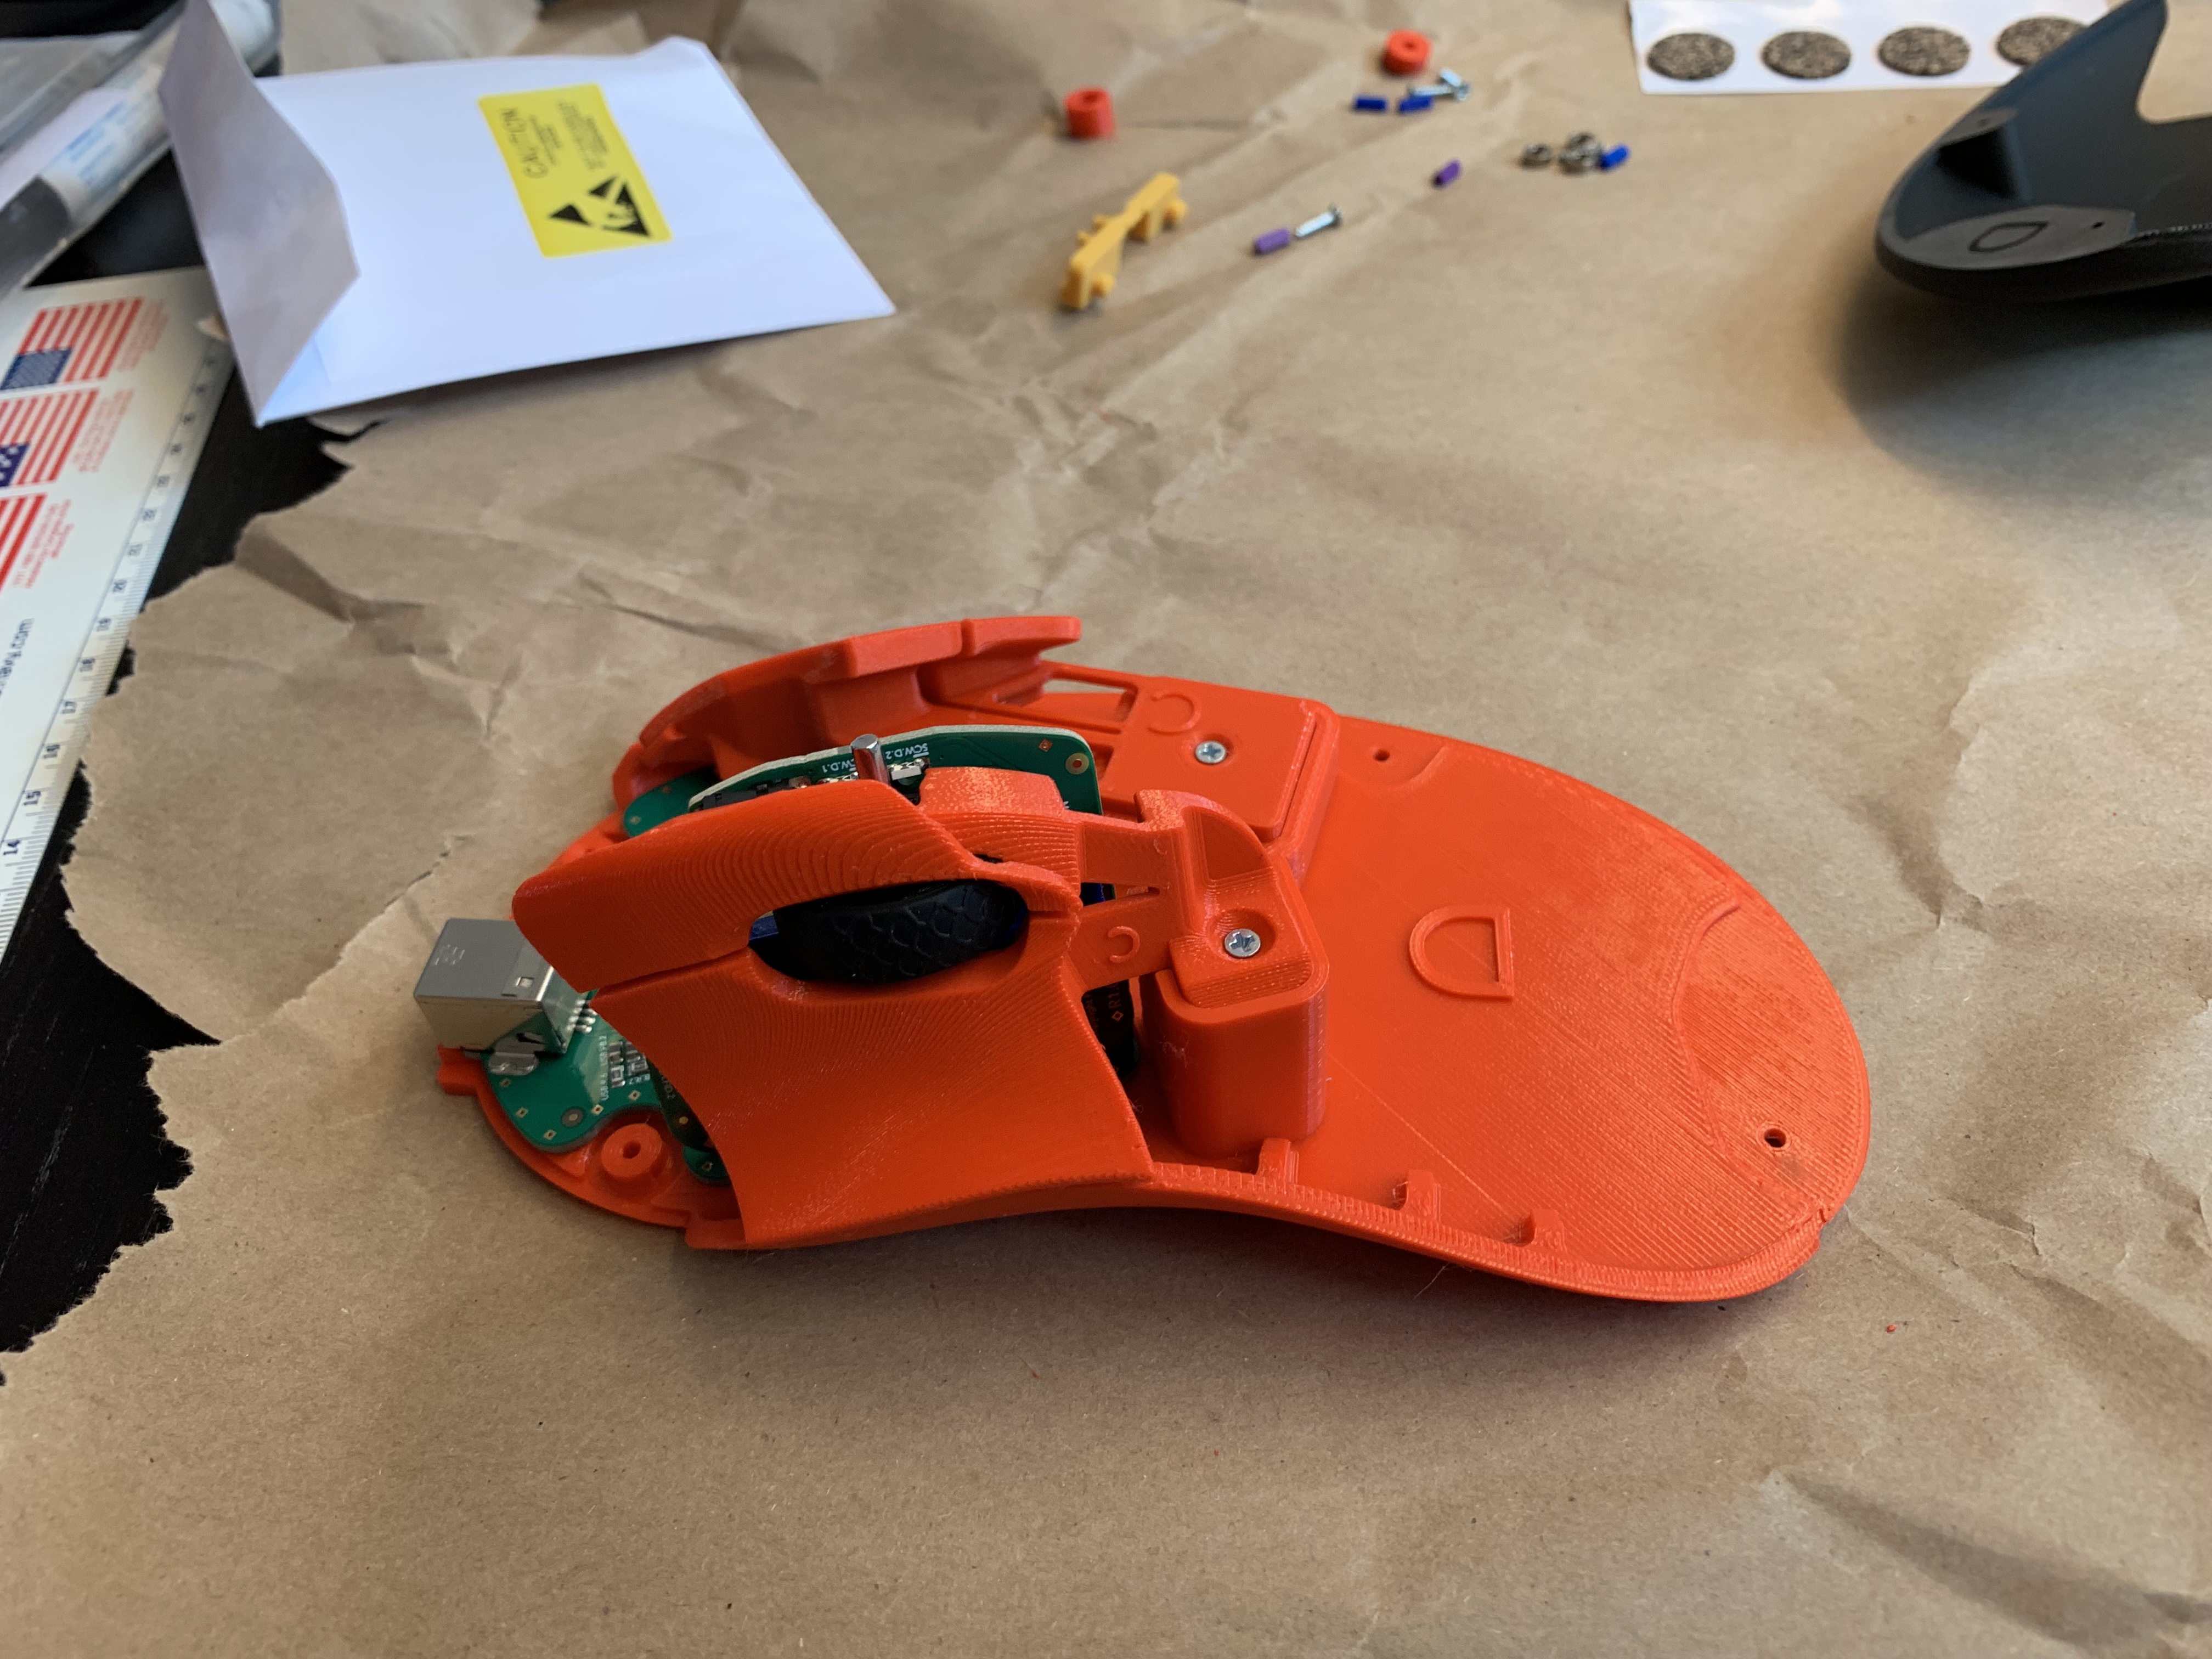
The scroll wheel gave me the most trouble out of everything. The dowels have to extend out of the scroll wheel holder by a very specific amount. Otherwise, the scroll wheel will rub against the shell or buttons. No matter what I tried, I could not stop the scroll wheel from rubbing. In the end, I removed the silicone ring from around the scroll wheel to eliminate all possibility of rubbing. At first I was annoyed I had to make this modification, but I actually like the scroll wheel better this way. Once the scroll wheel is in place, assembly is almost complete:
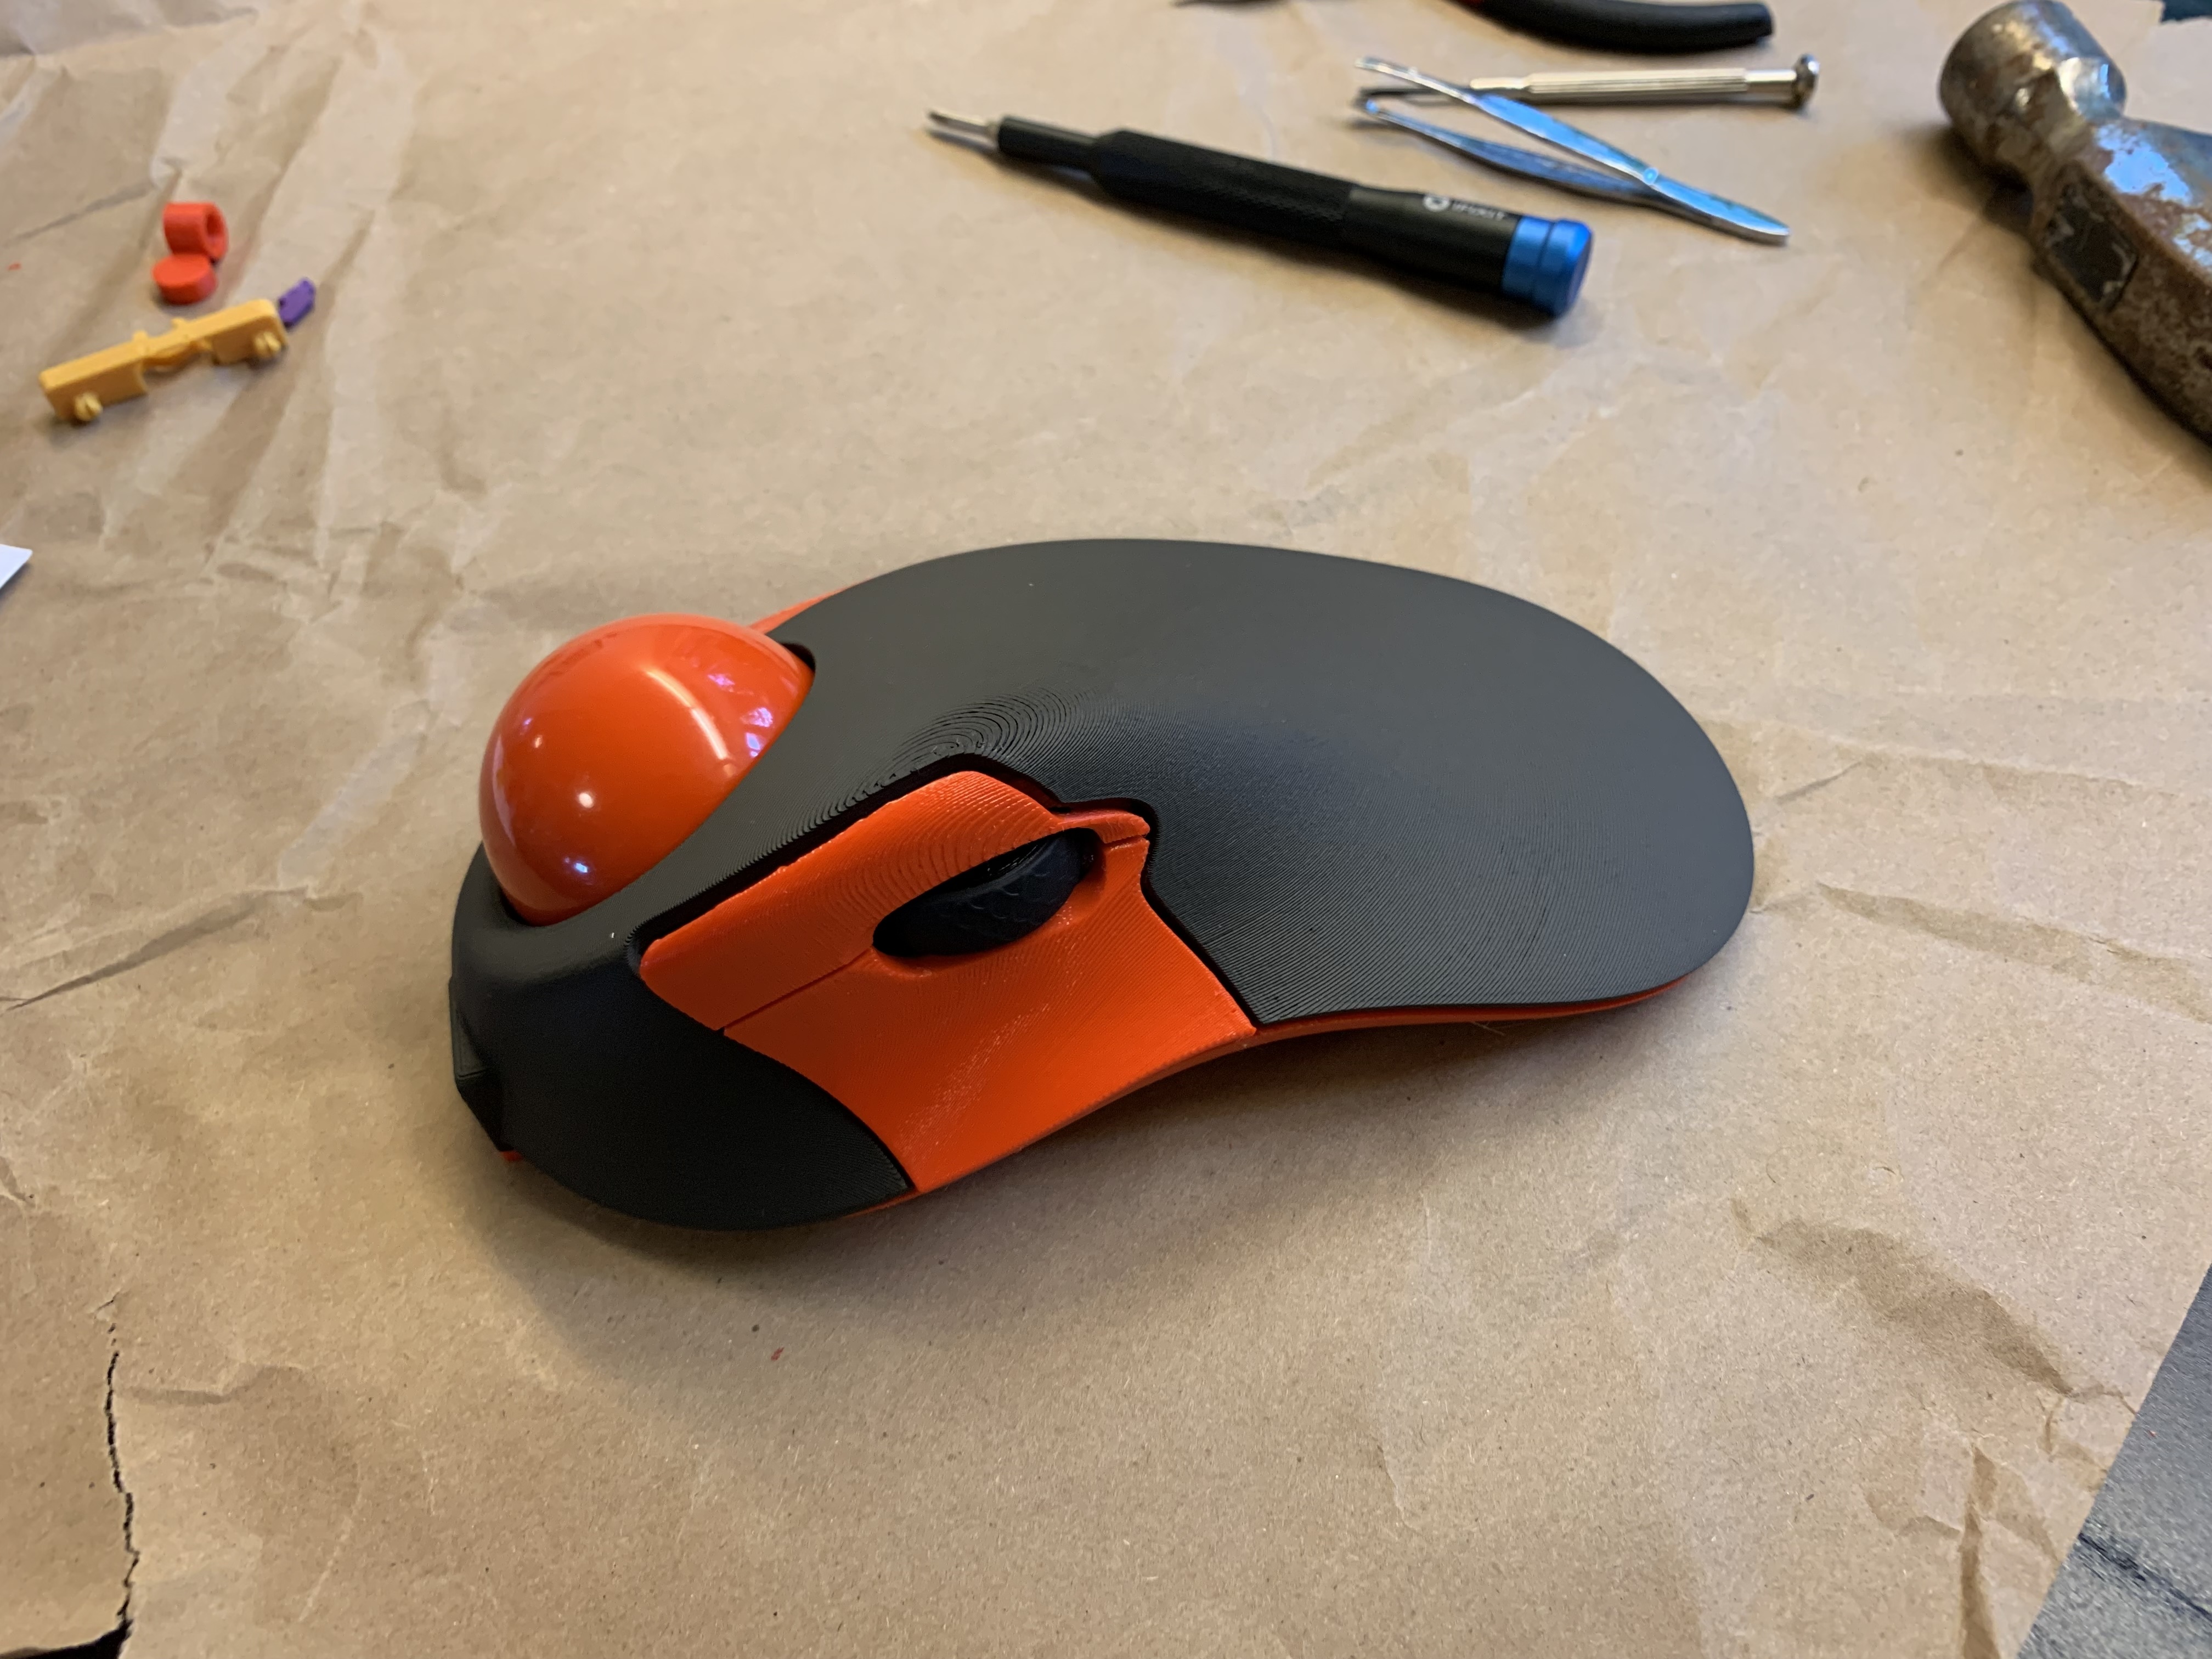
The final step to line up the scroll wheel dowel with the top shell and pop the top on took me longer than I care to admit. You have to twist the shell a bit to line everything up properly. After I did this once, it was much easier to do again. Here’s a picture of the finished product:
Next step was to plug it in, cross my fingers, and hope my soldering job was good enough. Turns out, everything worked as expected! I decided I didn’t like the default keymap, but fortunately the Ploopy Classic ships with QMK and you can use VIA to easily reconfigure the buttons. I kept the left click, moved right click to the other side, and replaced the original right click with drag scroll. In the end, my keymap looked like this:
[0] = LAYOUT( KC_BTN1, KC_BTN3, DRAG_SCROLL, KC_BTN2, KC_BTN4 ),
UPDATE: The following code changes are no longer necessary to adjust the drag scrolling functionality. Changes were introduced into the qmk_firmware repo to allow configuring drag scroll without the need to modify the code. I updated my Ploopy using this new configuration and it works great: https://github.com/eleniums/qmk_firmware/pull/2. I’m leaving the following code in case anyone is interested in the changes that were previously necessary.
Unfortunately, there are some issues with the default drag scrolling functionality. Moving the trackball just a small amount will cause the scrollbar to fly down the screen. I’m not sure who thought that would be acceptable, but there is a way to modify the code to scroll at a much more reasonable pace. First changes I made were in config.h to lower the DPI, set the mode to fixed-DPI scrolling, and invert the scroll direction (found on the Ploopy subreddit here):
#define PLOOPY_DRAGSCROLL_FIXED
#define PLOOPY_DRAGSCROLL_DPI 100
#define PLOOPY_DRAGSCROLL_INVERT
It still scrolled pretty quick though. In order to slow it down further, some code changes to trackball.c were necessary (compliments of https://blog.slinkyworks.net/ploopy-classic):
#ifndef PLOOPY_DRAGSCROLL_DENOMINATOR
#    define PLOOPY_DRAGSCROLL_DENOMINATOR 10
#endif
static int _dragscroll_accumulator_x = 0;
static int _dragscroll_accumulator_y = 0;

report_mouse_t pointing_device_task_kb(report_mouse_t mouse_report) {
    if (is_drag_scroll) {
#ifdef PLOOPY_DRAGSCROLL_H_INVERT
        // Invert horizontal scroll direction
        _dragscroll_accumulator_x += -mouse_report.x;
#else
        _dragscroll_accumulator_x += mouse_report.x;
#endif
#ifdef PLOOPY_DRAGSCROLL_INVERT
        // Invert vertical scroll direction
        _dragscroll_accumulator_y += -mouse_report.y;
#else
        _dragscroll_accumulator_y += mouse_report.y;
#endif
        int div_x = _dragscroll_accumulator_x / PLOOPY_DRAGSCROLL_DENOMINATOR;
        int div_y = _dragscroll_accumulator_y / PLOOPY_DRAGSCROLL_DENOMINATOR;

        if (div_x != 0) {
            mouse_report.h += div_x;
            _dragscroll_accumulator_x -= div_x * PLOOPY_DRAGSCROLL_DENOMINATOR;
        }

        if (div_y != 0) {
            mouse_report.v += div_y;
            _dragscroll_accumulator_y -= div_y * PLOOPY_DRAGSCROLL_DENOMINATOR;
        }
        mouse_report.x = 0;
        mouse_report.y = 0;
    }
    return pointing_device_task_user(mouse_report);
}
After these changes, the drag scroll feature finally worked as I would have expected. Here is a pull request in my fork of the qmk_firmware containing all the changes: https://github.com/eleniums/qmk_firmware/pull/1
Once I started using the Ploopy on a daily basis, I quickly recognized a need for a better method of dragging stuff around the screen. It’s pretty awkward to do with one hand. Eventually I settled on configuring mouse button clicks on a keyboard layer. My keyboard also supports QMK/VIA, so I set up these key combinations for mouse clicks:
Caps Lock+D: left click (mouse button 1)Caps Lock+S: right click (mouse button 2)Caps Lock+R: middle click (mouse button 3)Caps Lock+F: app switcher (mouse button 4)
It hasn’t taken me very long to get used to the above key combinations and now dragging is a breeze. I actually find myself using my keyboard for mouse button clicks almost as much as the actual mouse buttons, which has been making me consider purchasing a Ploopy Nano kit. The Ploopy Nano is a minimalist approach with just the trackball; no mouse buttons.
Anyway, to sum up the pros for the Ploopy Classic:
- Trackball with roller bearings is the best I’ve used.
- Shape is fairly ergonomic and comfortable.
- 3D printed surface texture is surprisingly nice, in my opinion.
- Open source: highly configurable and should be easy to repair.
And the cons:
- The scroll wheel isn’t great: it’s hard to install, chances are good it will rub against the shell, uncomfortable to use.
- Needs some technical knowledge to properly configure the drag scroll capability.
- There are scrolling issues on macOS (Windows works fine) where the scroll will stop working for a few seconds when switching scroll directions. This appears to be a QMK issue, but I’m not entirely sure what the root cause is. See this Ploopy post and this QMK post.
- Click and drag is awkward and uncomfortable to do with one hand.
- Constant clicking might cause some discomfort depending on how you rest your hand on the mouse.
- It’s pricey, especially if you purchase the fully assembled mouse.
After all is said and done, my experience with the Ploopy Classic has been a fun adventure. I’ve been using it for several weeks now and while I do not think it will solve all my arm pain issues, I love the trackball with roller bearings and intend to continue using it.